Deploying And Testing Logic Apps with GITHUB Actions
I have been examining GITHUB actions for last few days and I decided to try out a few workflows myself to learn how the CI CD process is implemented using them. In this post I will examine mostly on how to deploy a Logic App to a resources group and test it after the deployment. What follows now is the basest of the scenario which I used to understand the GITHUB actions.
Last few months there has been an increse in chatter over the internet around GITHUB actions so let us answer the question
What are GithHub actions?
GITHUB actions are the workflows that allow use to perform a set of actions when certain events occur on the repository. An event on repository can be as simple as "when a push is made to master branch" or "A pull request is raised on master branch". GITHUB allows us to automate certain responses to these events using automated workflows called as GithHub actions. These actions react to one or multiple events and perform certain tasks e.g. "Build and Run the tests", "Deploy the code", "Merge the code from one branch to another". This is kind of a reactive programming approach where when a developer or admin performs some action on the repository, the GITHUB action reacts to that and performs something.
We can build our end to end continuous integration(CI) and deployment (CD) for the code in the repository directly in the GITHUB. The great thing that I find about GITHUB actions is that there are lot of actions are avaialble out of box for us and there are some custom ones developed and shared by the community which we can implement in our code.
Following terminology will come handy later during the post
- Workflow: This is the automated process which will be run and can perform various tasks like builing, testing, publishing, deploying the code in the GitHub repository.
- Runners: Runners are the machines on which the workflows are executed. These runners can be either the default runners hosted by GitHub or you can use your own hosted runners.
- Job: Job is a set of steps that are executed on the same runner. It is there fore important for us to understand that all the processes that need datat sharing must be clubbed under same job.
- Action: Actions are the individual steps that are defined under a job.
You can read more about the GITHUB actions at About GITHUB Actions
Scenario
For the purpose of this post, I have created a simple HTTP triggered logic app which accepts following input
1{
2"FirstName": "Jon",
3"LastName": "Snow"
4}
and returns following response
1{
2    "FirstName": "Jon",
3    "FullName": "Jon Snow",
4    "LastName": "Snow"
5}
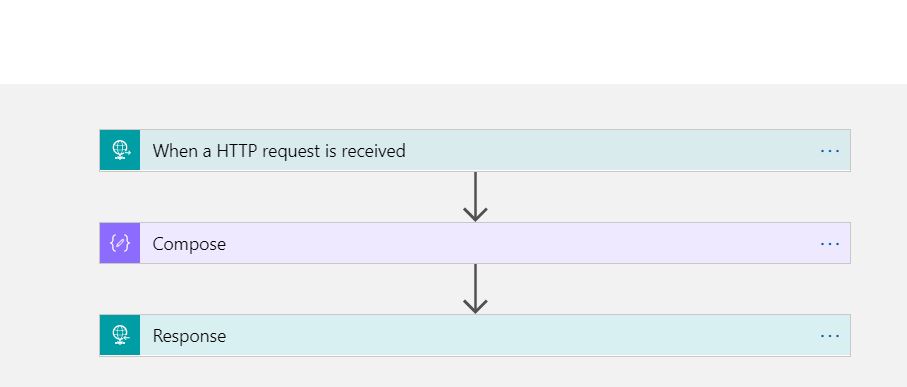
The logic app is very simple as shown below.
To deploy this logic app, we need to use the Azure ARM template. So the next step is to download the ARM template for the Logic App. This can be done using Visual Studio cloud explorer. The detailed instructions are available at Manage logic apps with Visual Studio The ARM template that we will use in this sample is shown below
 1{
 2  "$schema": "https://schema.management.azure.com/schemas/2019-04-01/deploymentTemplate.json#",
 3  "contentVersion": "1.0.0.0",
 4  "parameters": {
 5    "LogicAppLocation": {
 6      "type": "string",
 7      "minLength": 1,
 8      "allowedValues": [
 9        "australiaeast",
10        "australiasoutheast"
11      ]
12
13    },
14    "LogicAppName": {
15      "type": "string",
16      "minLength": 1
17
18    }
19  },
20  "variables": {},
21  "resources": [
22    {
23      "properties": {
24        "state": "Enabled",
25        "definition": {
26          "$schema": "https://schema.management.azure.com/providers/Microsoft.Logic/schemas/2016-06-01/workflowdefinition.json#",
27          "actions": {
28            "Compose": {
29              "type": "Compose",
30              "inputs": "@concat(triggerBody()?['FirstName'],' ',triggerBody()?['LastName'])",
31              "runAfter": {}
32            },
33            "Response": {
34              "type": "Response",
35              "kind": "Http",
36              "inputs": {
37                "statusCode": 200,
38                "headers": {
39                  "Content-Type": "application/json"
40                },
41                "body": {
42                  "FirstName": "@triggerBody()?['FirstName']",
43                  "FullName": "@outputs('Compose')",
44                  "LastName": "@triggerBody()?['LastName']"
45                }
46              },
47              "runAfter": {
48                "Compose": [
49                  "Succeeded"
50                ]
51              }
52            }
53          },
54          "parameters": {},
55          "triggers": {
56            "manual": {
57              "type": "Request",
58              "kind": "Http",
59              "inputs": {
60                "schema": {
61                  "properties": {
62                    "FirstName": {
63                      "type": "string"
64                    },
65                    "LastName": {
66                      "type": "string"
67                    }
68                  },
69                  "type": "object"
70                }
71              }
72            }
73          },
74          "contentVersion": "1.0.0.0",
75          "outputs": {}
76        },
77        "parameters": {}
78      },
79      "name": "[parameters('LogicAppName')]",
80      "type": "Microsoft.Logic/workflows",
81      "location": "[parameters('LogicAppLocation')]",
82      "tags": {
83        "displayName": "LogicApp"
84      },
85      "apiVersion": "2016-06-01"
86    }
87  ],
88  "outputs": {
89     "logicAppUrl": {
90      "type": "string",
91      "value": "[listCallbackURL(concat(resourceId('Microsoft.Logic/workflows/', parameters('LogicAppName')), '/triggers/manual'), '2016-06-01').value]"
92   }
93  }
94}
The parameters file associated with this is as following.
 1{
 2    "$schema": "https://schema.management.azure.com/schemas/2019-04-01/deploymentParameters.json#",
 3    "contentVersion": "1.0.0.0",
 4    "parameters": {
 5      "LogicAppName": {
 6        "value": "az-httplogicapp-prod"
 7      },
 8      "LogicAppLocation": {
 9        "value": "australiaeast"
10      }
11    }
12  }
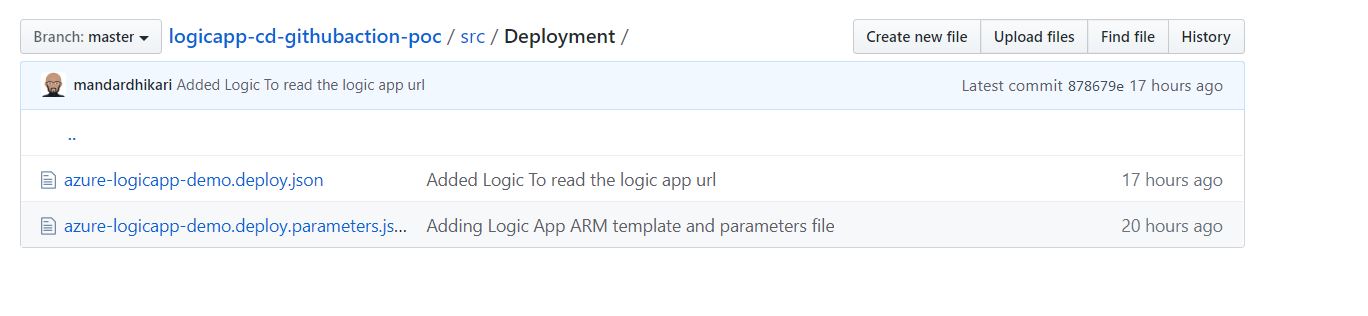
These templates are checked into the repository as shown below.
And that completes the set up of the logic app ARM templates.
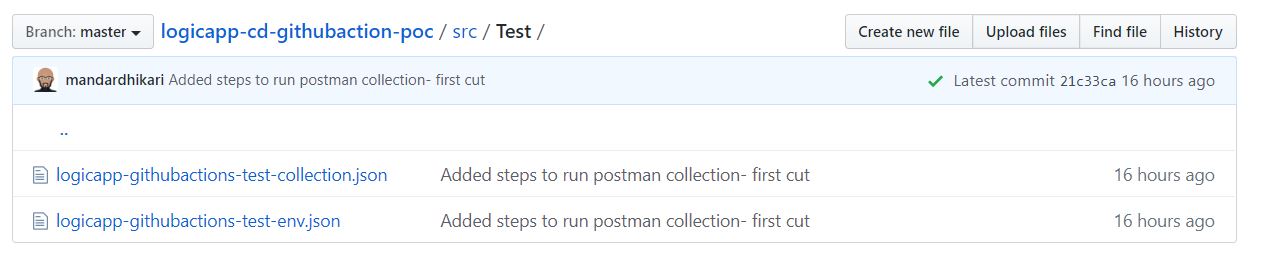
I like testing my APIs using POSTMAN collections. So, I am adding the steps to run POSTMAN collections in the GITHUB Actions workflow. I have exported the POSTMAN collection and the environment file and added it to the repository as shown below.
Setting Up GITHUB Action Workflow
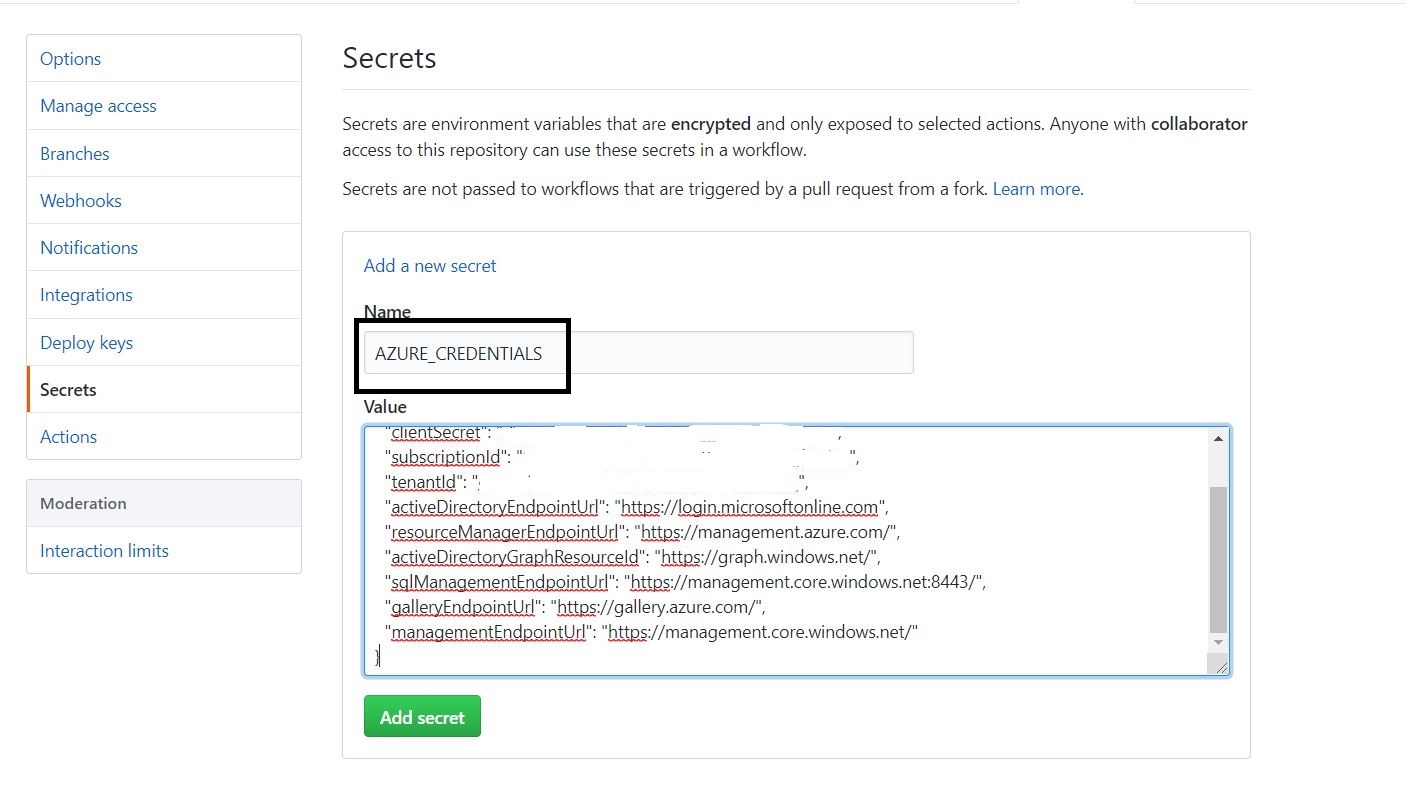
Adding AZURE Credentials
I am using Azure CLI to do deploy the ARM templates to the Resource Groups. The workflow needs access to the azure credentials to log on to azure and execute the Azure CLI commands. For this we create the service principal inside the Azure Active Directory. In this scenario, we are creating a new resource group to deploy the logic app to. Hence the service principal needs the Contributor level access on the subscription. This is done by executing the command shown below
1az ad sp create-for-rbac --name "arm-template-deployment" --role contributor --scopes /subscriptions/{subscription-id} --sdk-auth
2
This command can be run from either the console on local machine or by using Azure Cloud Shell. once executed it will return a json containing the details of the service principal.
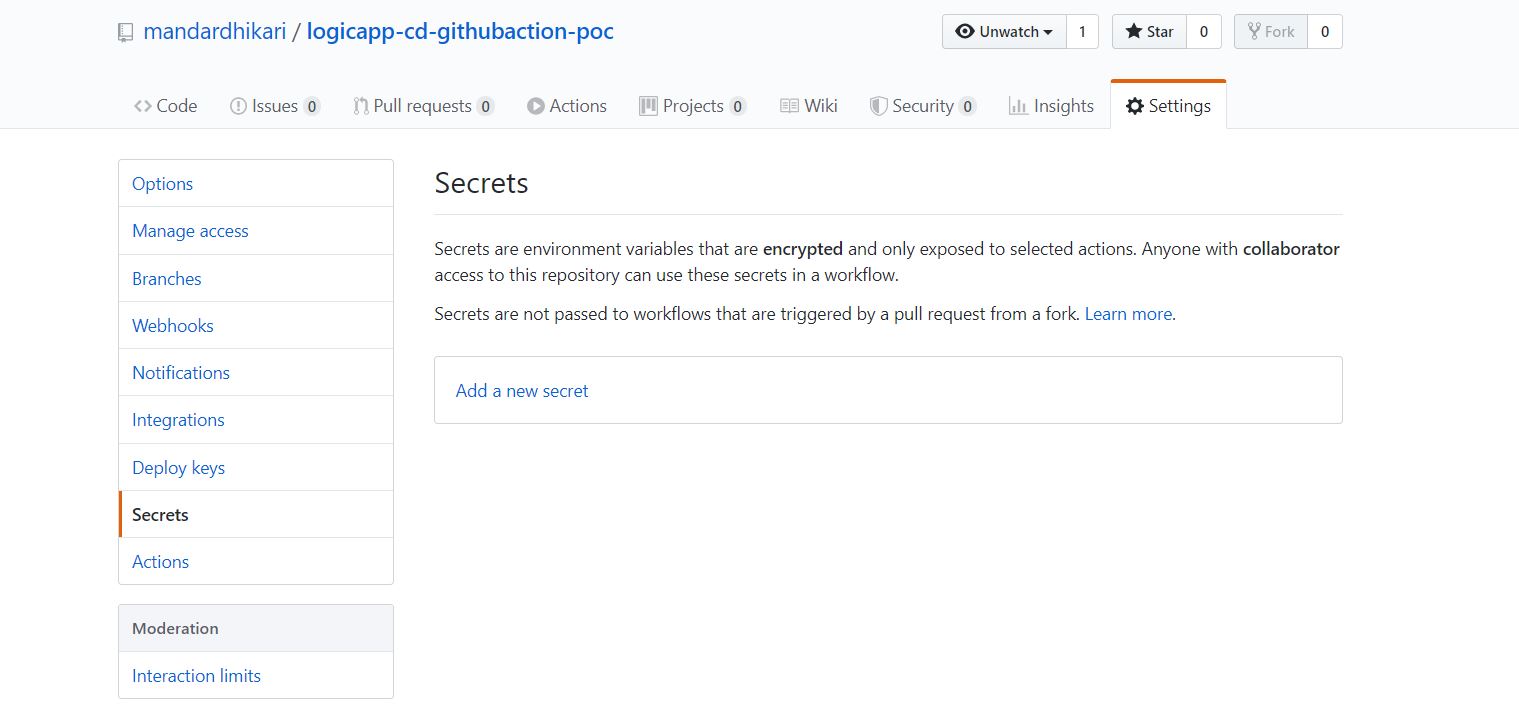
The next step is to add this secret to the GITHUB repository so that the workflow has access to it. The secrets can be accessed inside the workflow using ${{secrets.secretName}} syntax. This allows us to save the sensitive information in the secrets and access it later on in the workflow. The secret can be added to the repository as shown in folllowing images.
Adding an ACTION
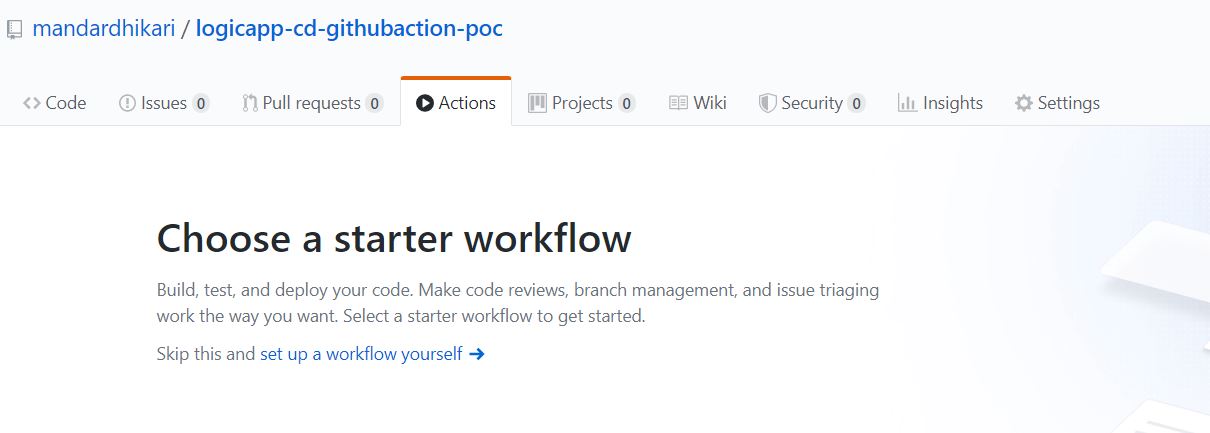
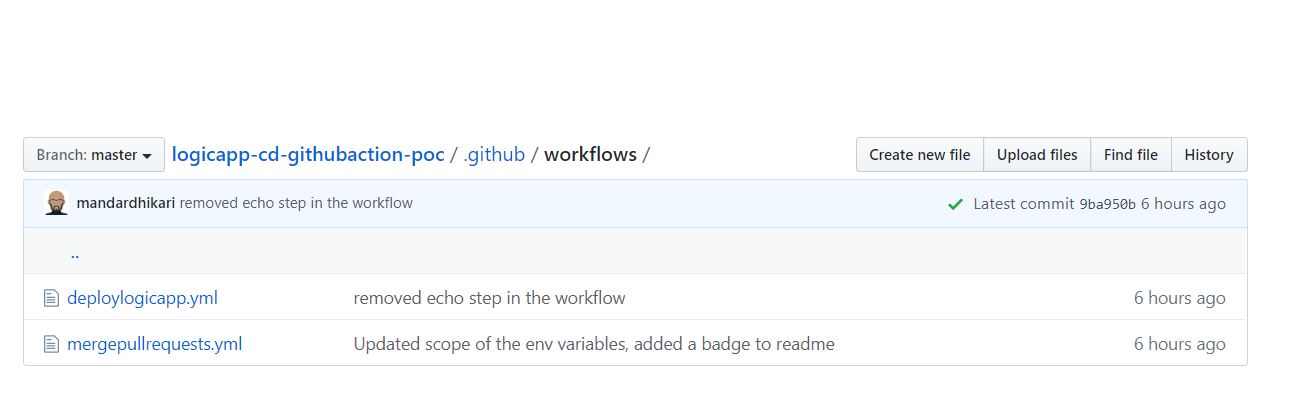
The actions are defined in a yamal file and are located in the .github/workflows folder. This folder structure can be created using as part of coding exercise or alternatively, the workflows can be created directly on repository using the Actions pane on the GITHUB website. Following image shows how to create the action on the website.
I prefer writing my yaml file using Visual Studio Code. And I like the GitHub Actions extension available. You can check out the extension at GitHub Actions Extension. This extrension makes it easier to author the workflow files as it provides a built in intellisense.
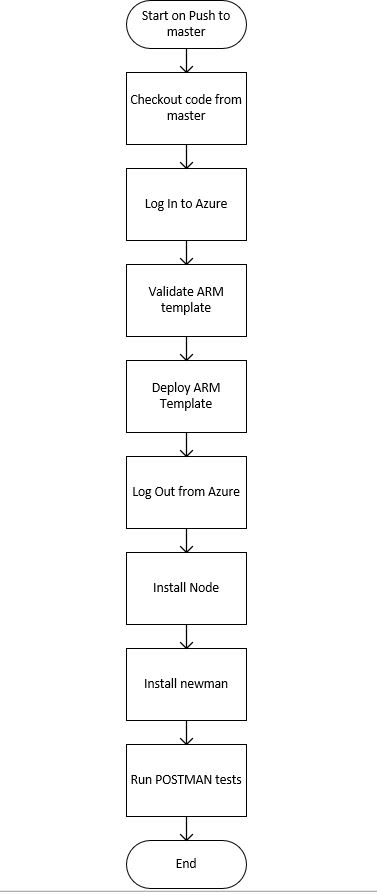
Now that we have the basic stuff in place, let us take a look at the flow of the workflow. The various steps that this flow will perfrom are shown below
The Workflow File
We start by adding the trigger on which our GitHub Action workflow will run. This is done in the yaml file as shown below
1#Name of the GitHub Action
2name: Deploy Logic App
3
4#Set the action on which the workflow will trigger
5on:
6 push:
7   branches:
8     - master
9
Above lines of code define the name of the worklow and the that it will run when a push event occurs on the master branch of the repository.
Next we create the job and define the environment variables that are used and the runner on which the job will be run.
1jobs:
2  validate-and-deploy:
3   runs-on: ubuntu-latest
4   env:
5     ENV_RESOURCEGROUP: az-logicapp-githubactions-demo-rg
6     ENV_RESOURCEGROUPLOCATION: australiaeast
This peice of code will create a job called validate-and-deploy and this will be run on a ubuntu runner. Also the value of the resource-group and location variables are also set so as to be available across the entire job.
Now we start defining the individual steps that will be executed inside the job.
Checking out the code
The code is checked out using folllowing set of command
1   steps:
2
3    #Checkout the repository
4    - name: Checkout Repository
5      uses: actions/checkout@master
actions/checkout@master is the action available across all the runners and we can use actions offered by GitHub or developed by community.
Logging into Azure
We login to the Azure using the credentials we saved while creating the service principal alon with the azure/login@v1 action available from GitHub community. The code is shown below.
1#Use the azure provided action to log on to azure using service pricipal
2    - name: Login to Azure
3      uses: azure/login@v1
4      with:
5          creds: ${{secrets.AZURE_CREDENTIALS}}
Notice how the credentials are accessed using secrets.AZURE_CREDENTIALS
Creating the Resource Group
The resource group is created using following
1# Create the resource group
2    - name: Create Resource Group
3      run: az group create -n ${{env.ENV_RESOURCEGROUP}} -l ${{env.ENV_RESOURCEGROUPLOCATION}}
Validating the ARM Template and Deploying It
The ARM templates are validated and deployed using the az deployment CLI commands. The can be found at Az Deployment CLI
The code for validation and the deployment is as following.
 1#Validate the  ARM template
 2    - name: Validate ARM template
 3      run: |
 4                az deployment group validate -g ${{env.ENV_RESOURCEGROUP}} --mode Incremental --template-file ./src/Deployment/azure-logicapp-demo.deploy.json --parameters ./src/Deployment/azure-logicapp-demo.deploy.parameters.json
 5
 6    #Deploy the ARM Template
 7    - name: Deploy Logic App
 8      run: |
 9              echo "::set-env name=logicappurl::$(az deployment group create -g az-logicapp-githubactions-demo-rg --template-file ./src/Deployment/azure-logicapp-demo.deploy.json --parameters ./src/Deployment/azure-logicapp-demo.deploy.parameters.json --query 'properties.outputs.logicAppUrl.value' -o tsv)"
10      shell: bash
11
Here we are also saving the logic app trigger url by reading it from the az deployment group create CLI command and saving it into a variable called logicappurl. It should be noted that though the value is set in the Deploy Logic App step, it will not be accissible to the actiions in this step, all following steps will have access to the logicappurl variable.
Logging Out
Once the deployment is done, the workflow will log out of the azure. It can be done as shown below.
1# Log Out From Azure
2    - name: Logout
3      run: az logout
This completes the deployment part of the workflow, now we want to run some integration tests against the Logic App that was deployed. As mentioned earlier, I used POSTMAN collections to test the API.
Installing Node and Newman
POSTMAN can be run inside the CICD agents using command prompt utility called Newman. To install newman we first need to install node.js on the runner. It is done as shown below.
1# Install Node.js environment
2- name: set up node
3      uses: actions/setup-node@v1
4      with:
5          node-version: '12.x'
6
7# Install newman
8    - name: Install newman
9      run: npm install -g newman
Running POSTMAN collections
Once newman is installed, it becomes easy to run the postman collection. It is done as shown in following code snippet.
1- name: Run Postman collection
2      run: |
3              newman run ./src/Test/logicapp-githubactions-test-collection.json -e ./src/Test/logicapp-githubactions-test-env.json --env-var "url= ${{env.logicappurl}}"
It is evident why required the logicappurl variable in the first place ;)
This completes our workflow. The entire worklow definition as a yaml file is shown below.
Results
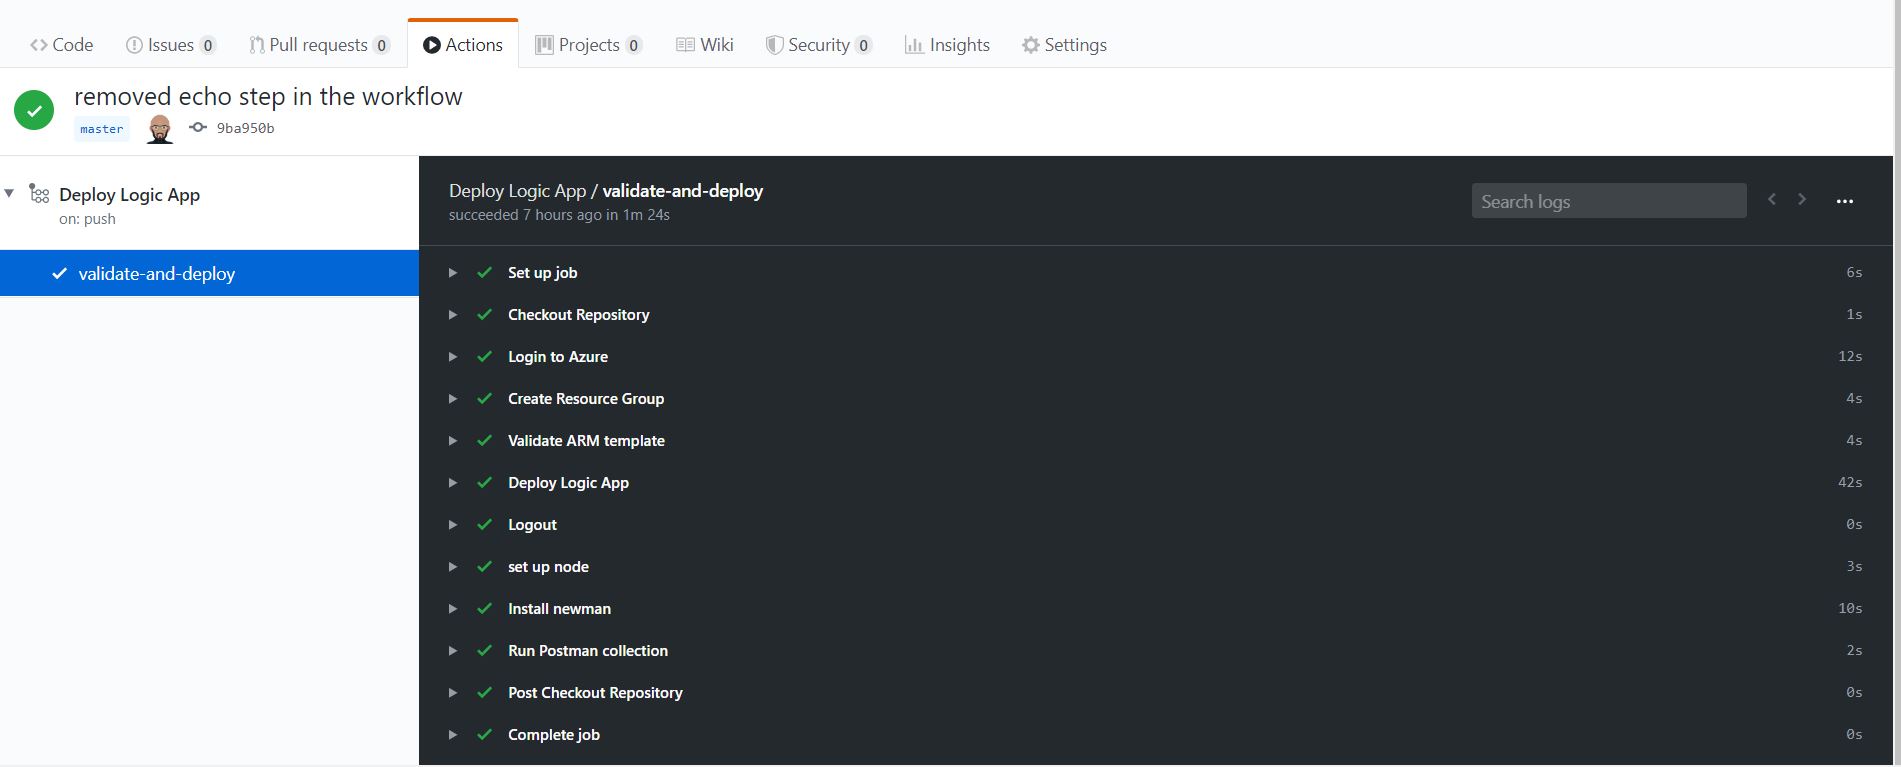
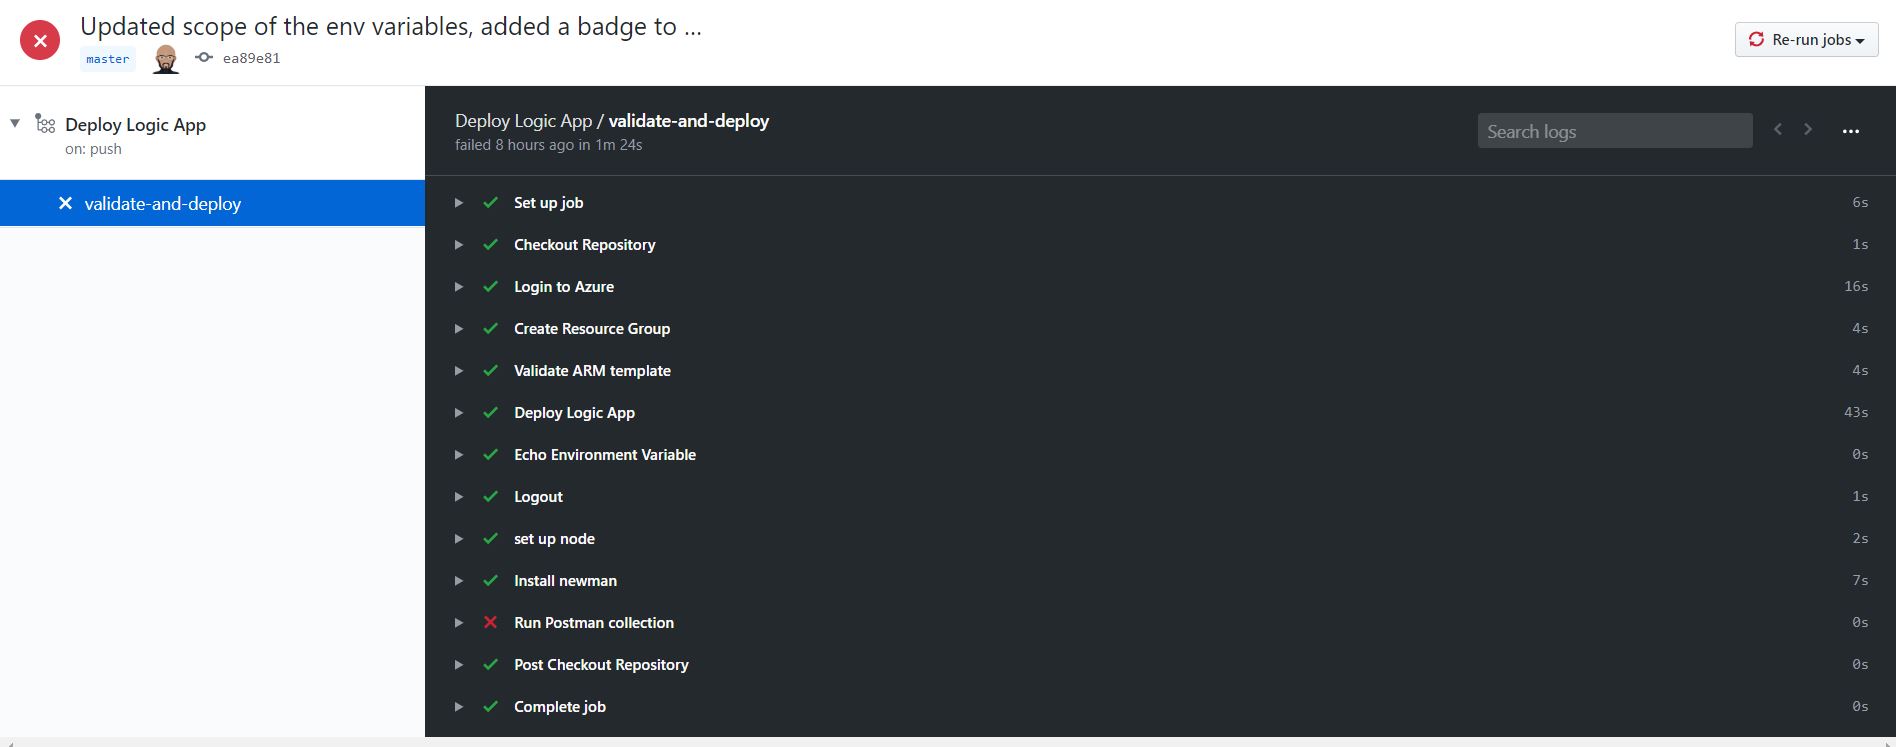
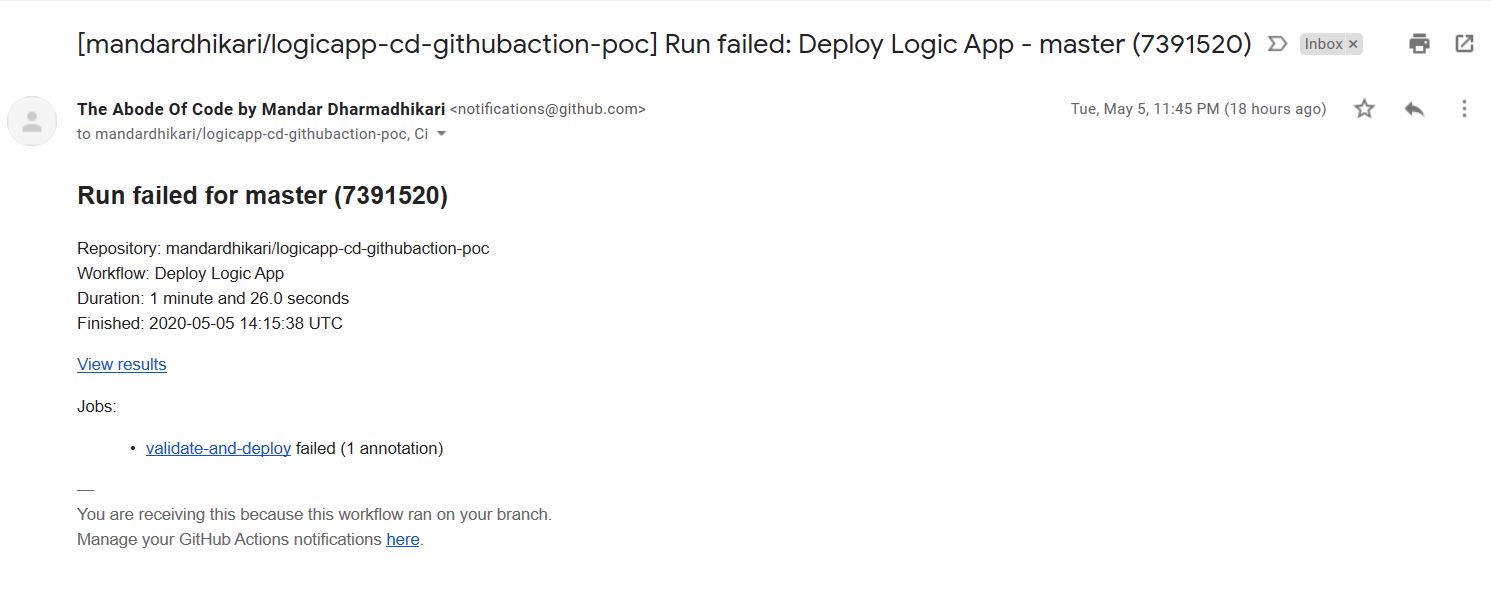
Once some code changes are pushed, the workflow will fire up automatically and in happy case deploy and successfully test the logic app. The output of each build is avilable on the Actions pane of the repository and we can drill down into each flow to see why it failed. In case of the failure, by default a notification is sent to the owner of the repository to notyify them of the failed build. Following images show the successful as well as the failed results.

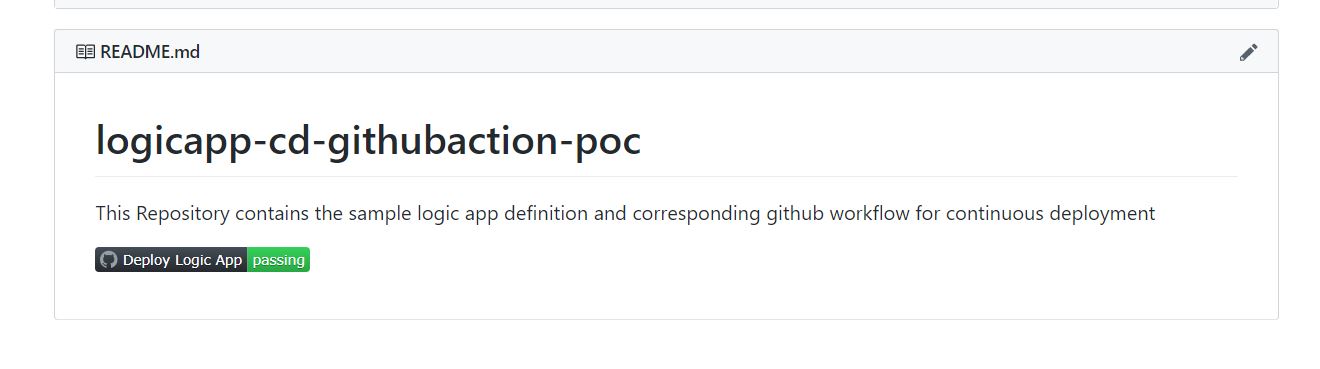
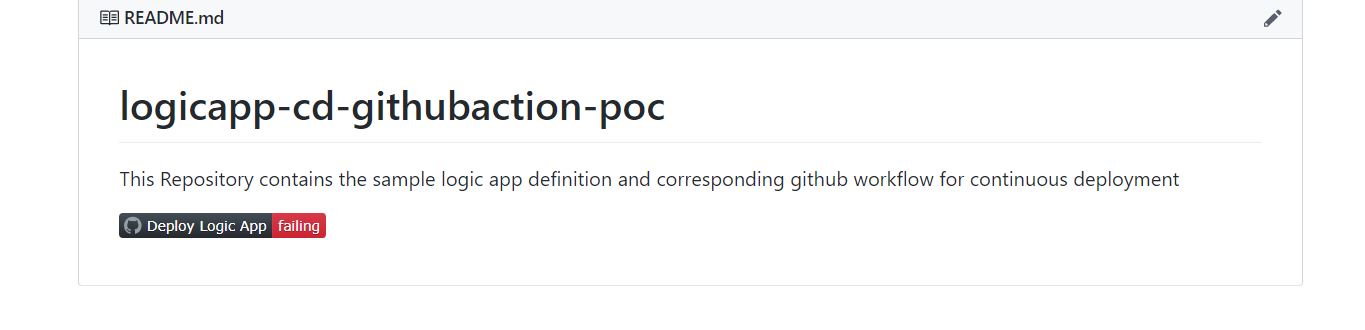
The run status can be beautified on the readme.md file as shown below.
Wrapping Up
In this post we saw how easliy we can set up the GitHub Actions workflow to deploy and test the Logic Apps. All we need is a basic understanding of the GitHub Actions and yaml. The workflow discussed today is a basic workflow and it does not cover the failure strategy, I will discuss that in future posts.